
Create your permanent webpage without code
Have you always wanted to create your own webpage and publish it permanently on the internet but don’t know how to code? Don’t worry! This guide will walk you through how to create a permanent webpage without writing a single line of code. In just a few simple steps, you’ll be able to create your own digital business card, personal blog, or portfolio and showcase your unique digital space effortlessly!
Author: Marshal Orange
Reviewer: Kyle
Source: Content Guild - News
Originally published at: PermaDAO
Original link: https://permadao.notion.site/Create-your-permanent-webpage-without-code-337dd9bd03c9468fae831046f1af6d9c?pvs=4
Have you dreamed of having your own personal webpage or dApp, but felt stuck because you don’t know how to code? Building a permanent webpage with zero coding skills is no longer reserved for programmers. Even without a technical background, you can follow the steps in this guide to create your own static webpage and deploy it permanently on the blockchain. It will be accessible via the internet for good! In just 10 minutes, you’ll have your very own permanent webpage.
Here’s an overview of the process:
Design your page
Convert your design into HTML code
Upload the code to Arweave
Use ArNS to access the page via a domain name
After completing these four steps, you can access your webpage through any Arweave gateway. This guide is designed so that even without any programming experience, you can easily follow along!
Step 1: Design Your Page
The first step is to design your page using drag-and-drop design tools. Tools like Figma or Canva are commonly used in the UI/UX design industry and are as easy to use as creating a PowerPoint presentation. You can start designing your content online and quickly get the hang of it in just a few hours.
For this guide, we’ll use the industry-standard tool Figma to design your page. Here’s how:
Create a new file: Click “+ New File” to create a new project.
Add pages: Use the “Pages” panel on the left to manage your pages. By default, you’ll start with one page, but you can add more if needed.
Start designing: Use the toolbar’s shapes, text boxes, and other elements to create your page layout. Alternatively, browse community templates for inspiration.
Manage components: Save commonly used elements (such as buttons or navigation bars) as components for reuse.
For more detailed tutorials, check out Figma Help Center.
Alternatively, you can use tools like Wix or Webflow, which allow you to create high-quality pages by customizing pre-designed templates. These tools can also generate the code for you (though some features may require a paid plan).
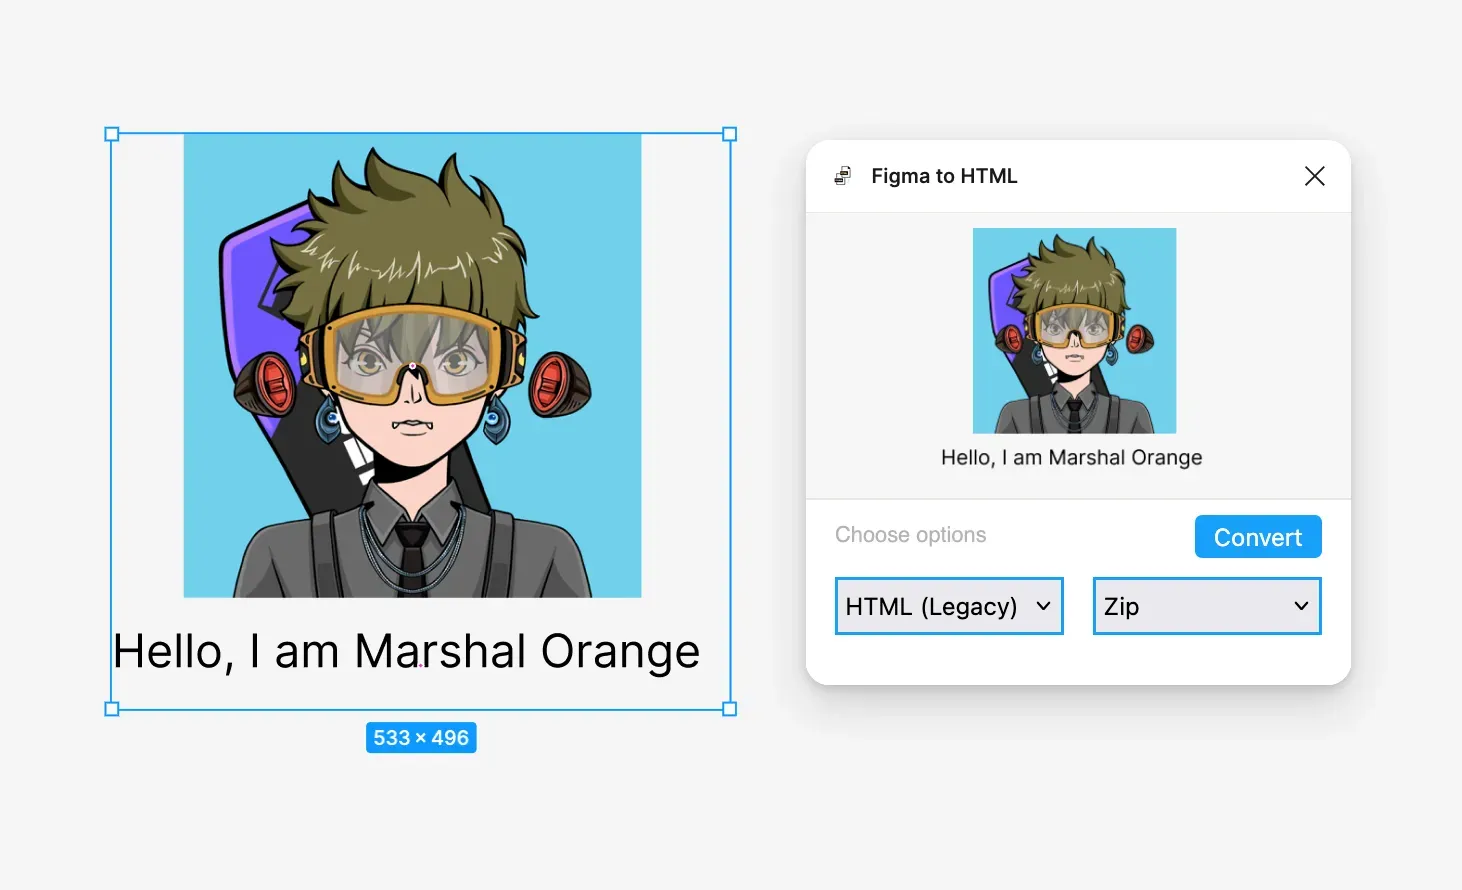
Step 2: Convert Your Design into HTML Code
Once your Figma design is complete, you can use Figma plugins to convert the design into static HTML code. Simply go to the Figma Community and search for plugins like “Figma to HTML”. These plugins automatically generate the HTML and CSS code based on your design elements.
If you have some coding experience, you can manually export resources and create HTML code by following these steps:
Export design elements: Right-click on images or icons in Figma, then select Export As PNG/JPG/SVG.
View component properties: Right-click on design components and select Inspect to see their CSS properties.
Combine resources and code: Use the exported assets and CSS properties to create a complete HTML page.
Step 3: Upload Your Code to Arweave
After exporting your webpage code, test it locally by opening the HTML file in your browser or using tools like Live Server. Once everything works perfectly, upload the code to Arweave, a blockchain that provides permanent hosting for frontend files.
We recommend using SiteUploaderOnArweave, a tool created by the PermaDAO community contributor FarMer, for easy one-click uploading. Visit the tool here: SiteUploaderOnArweave.
Steps:
Upload the entire folder containing your webpage files.
Set the homepage file by selecting “Set as index.”
Click “Upload Files and Generate Manifest” to upload your files to Arweave.
Note: Ensure you have some $AR tokens in your wallet to cover upload fees. For small files, 0.01 AR is sufficient.
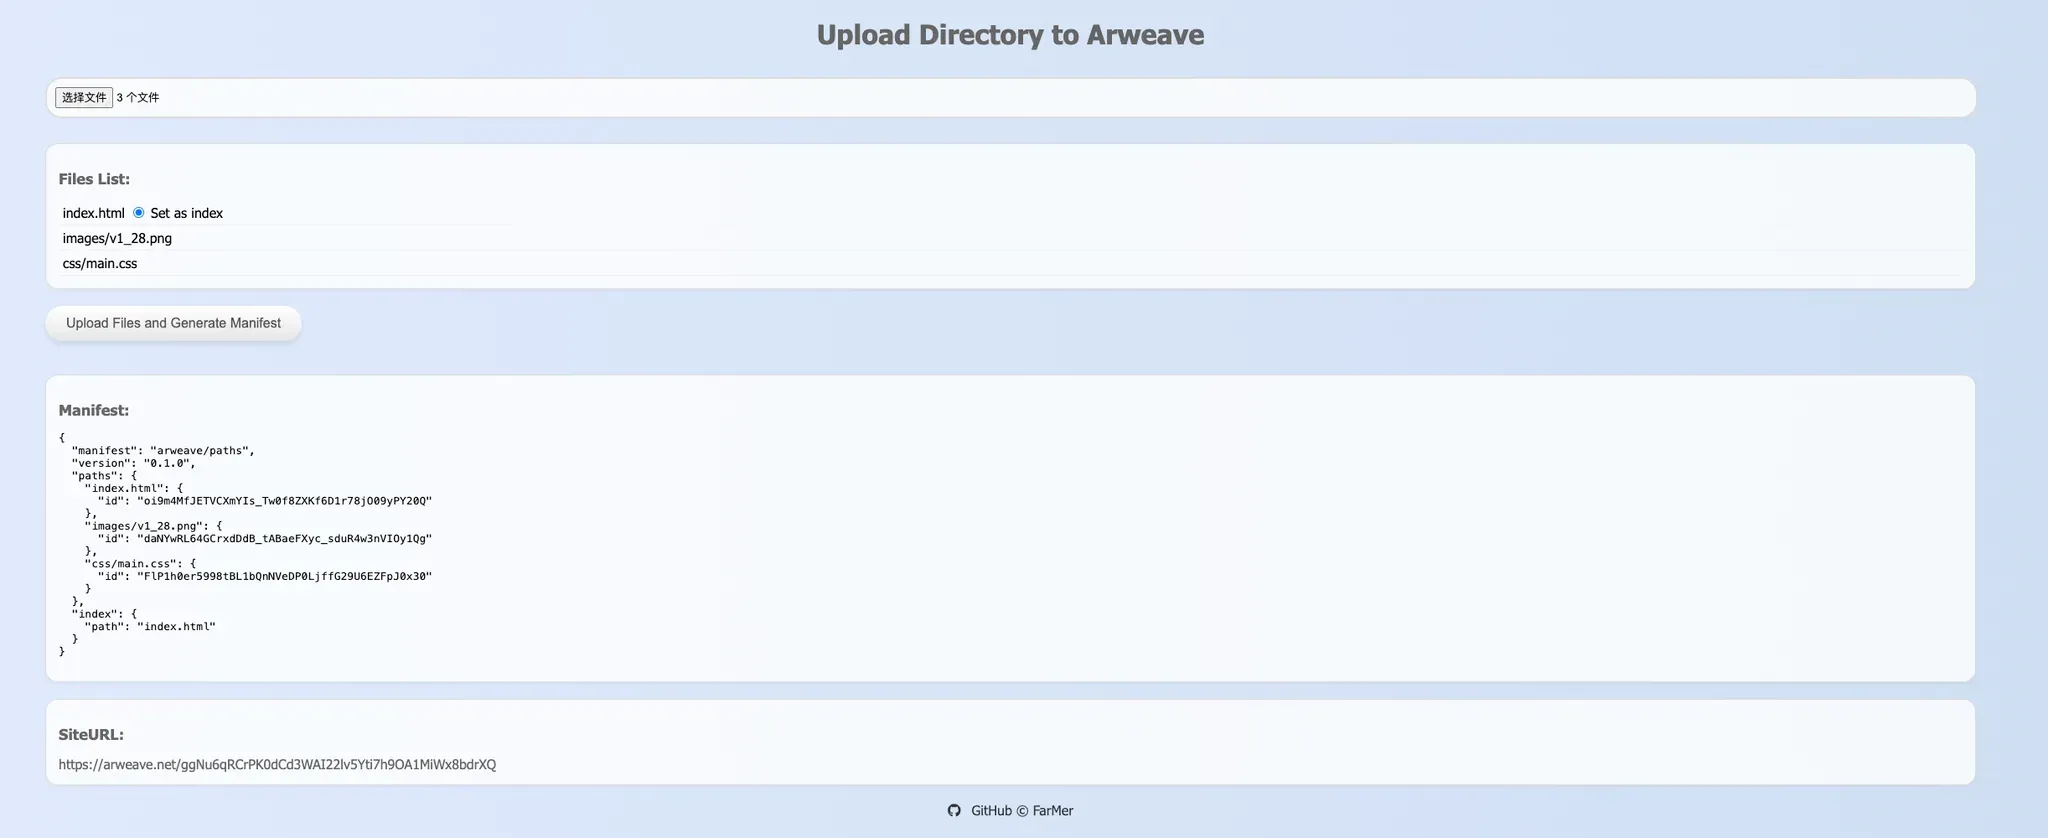
Once uploaded, the tool will display the transaction hash and the link to your hosted webpage. For example:
https://arweave.net/ggNu6qRCrPK0dCd3WAI22lv5Yti7h9OA1MiWx8bdrXQ.
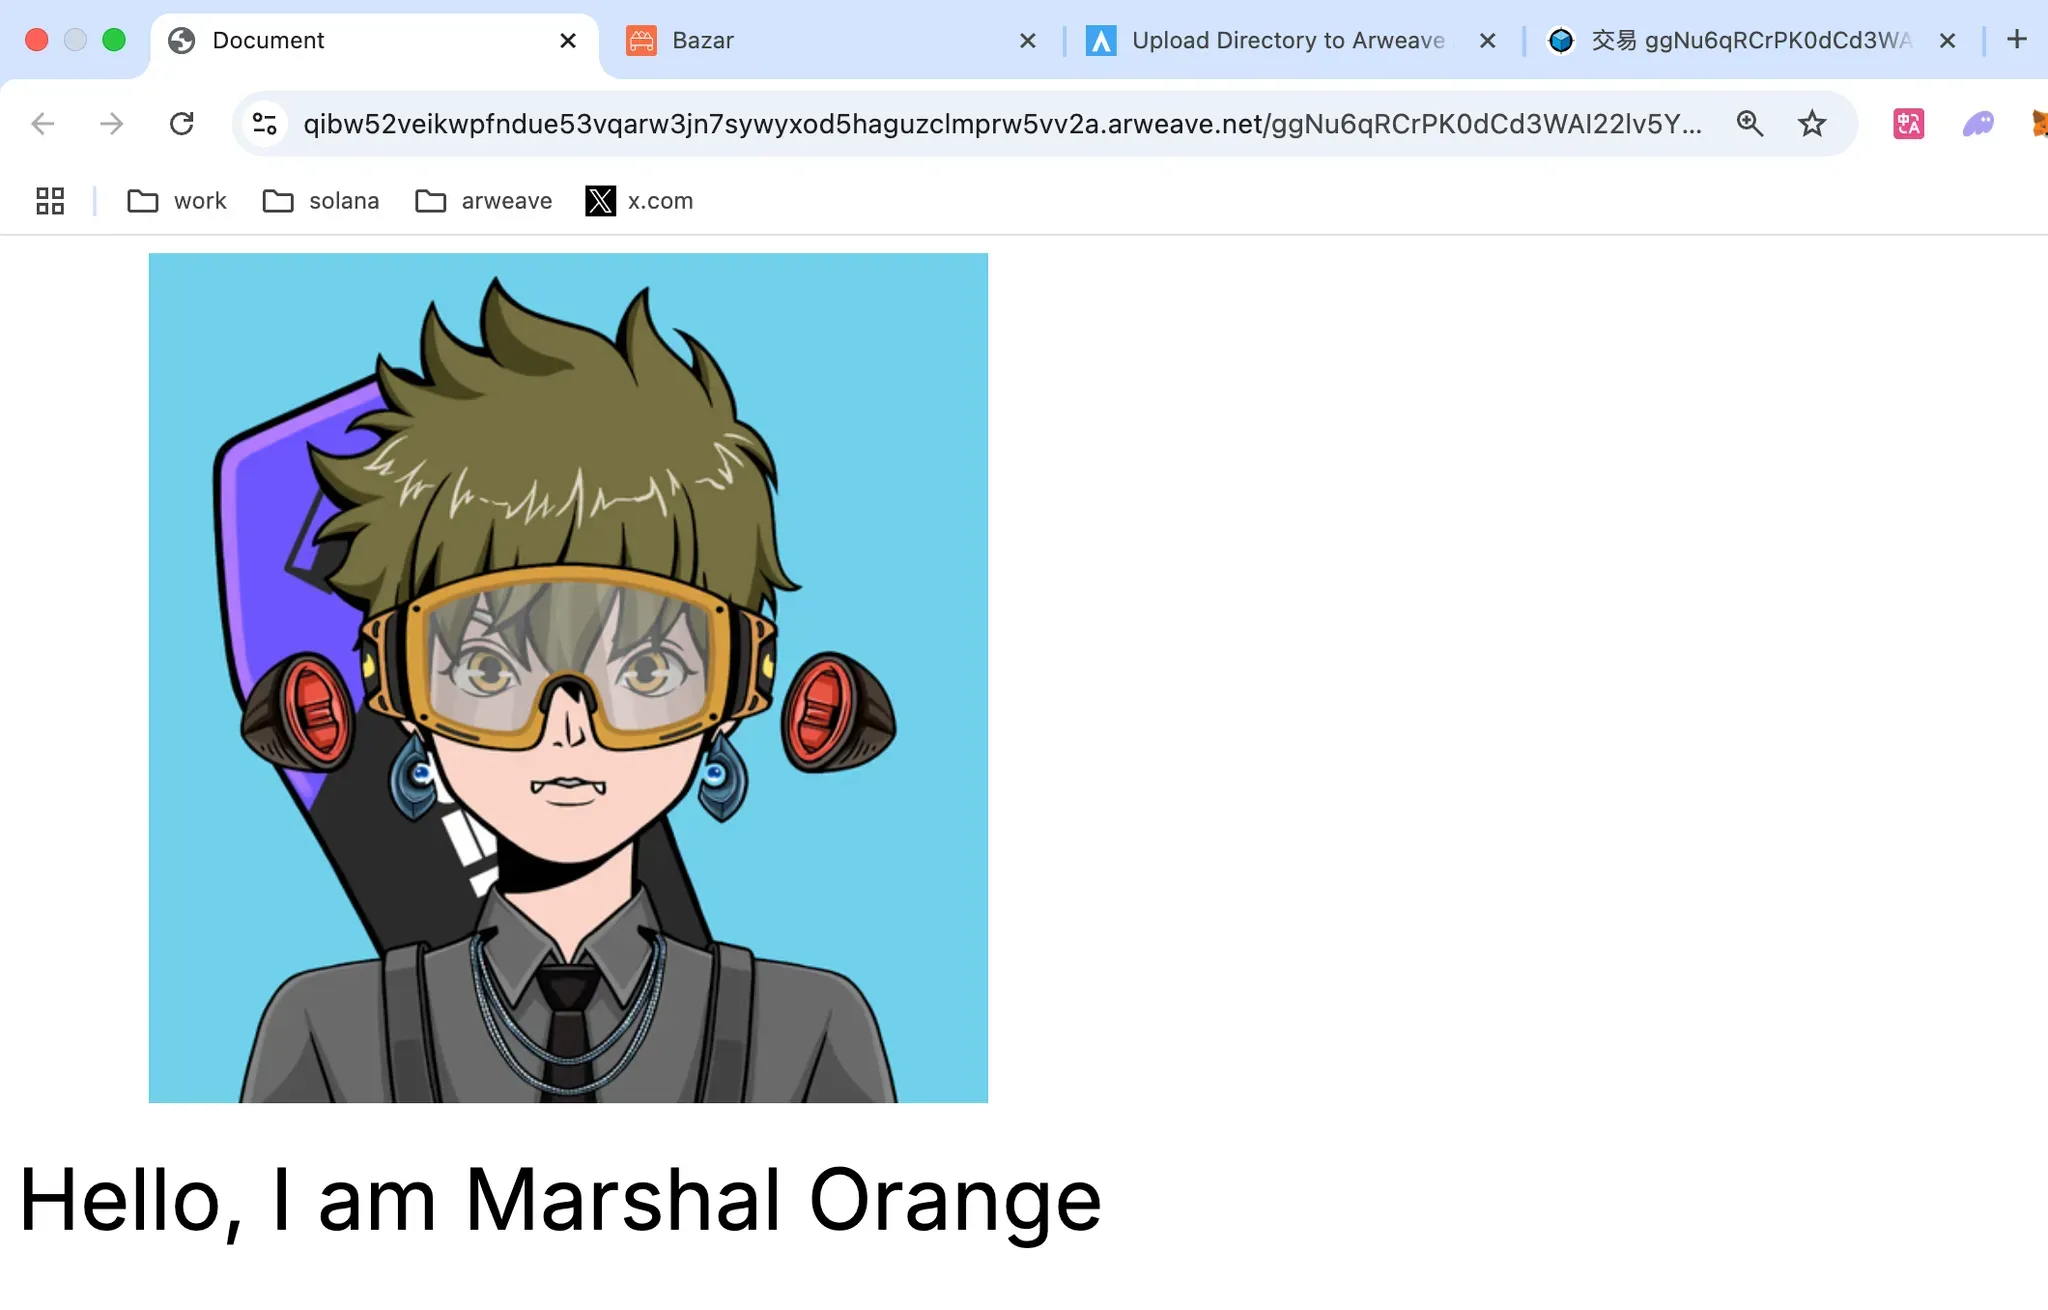
Just click on the link, and congratulations! Your permanent webpage is ready.
4. Setting Up ArNS for Domain Access
You may have noticed that the URL format follows “arweave.net/{hash}.” For example, after uploading, my webpage is accessible at:
https://arweave.net/ggNu6qRCrPK0dCd3WAI22lv5Yti7h9OA1MiWx8bdrXQ.
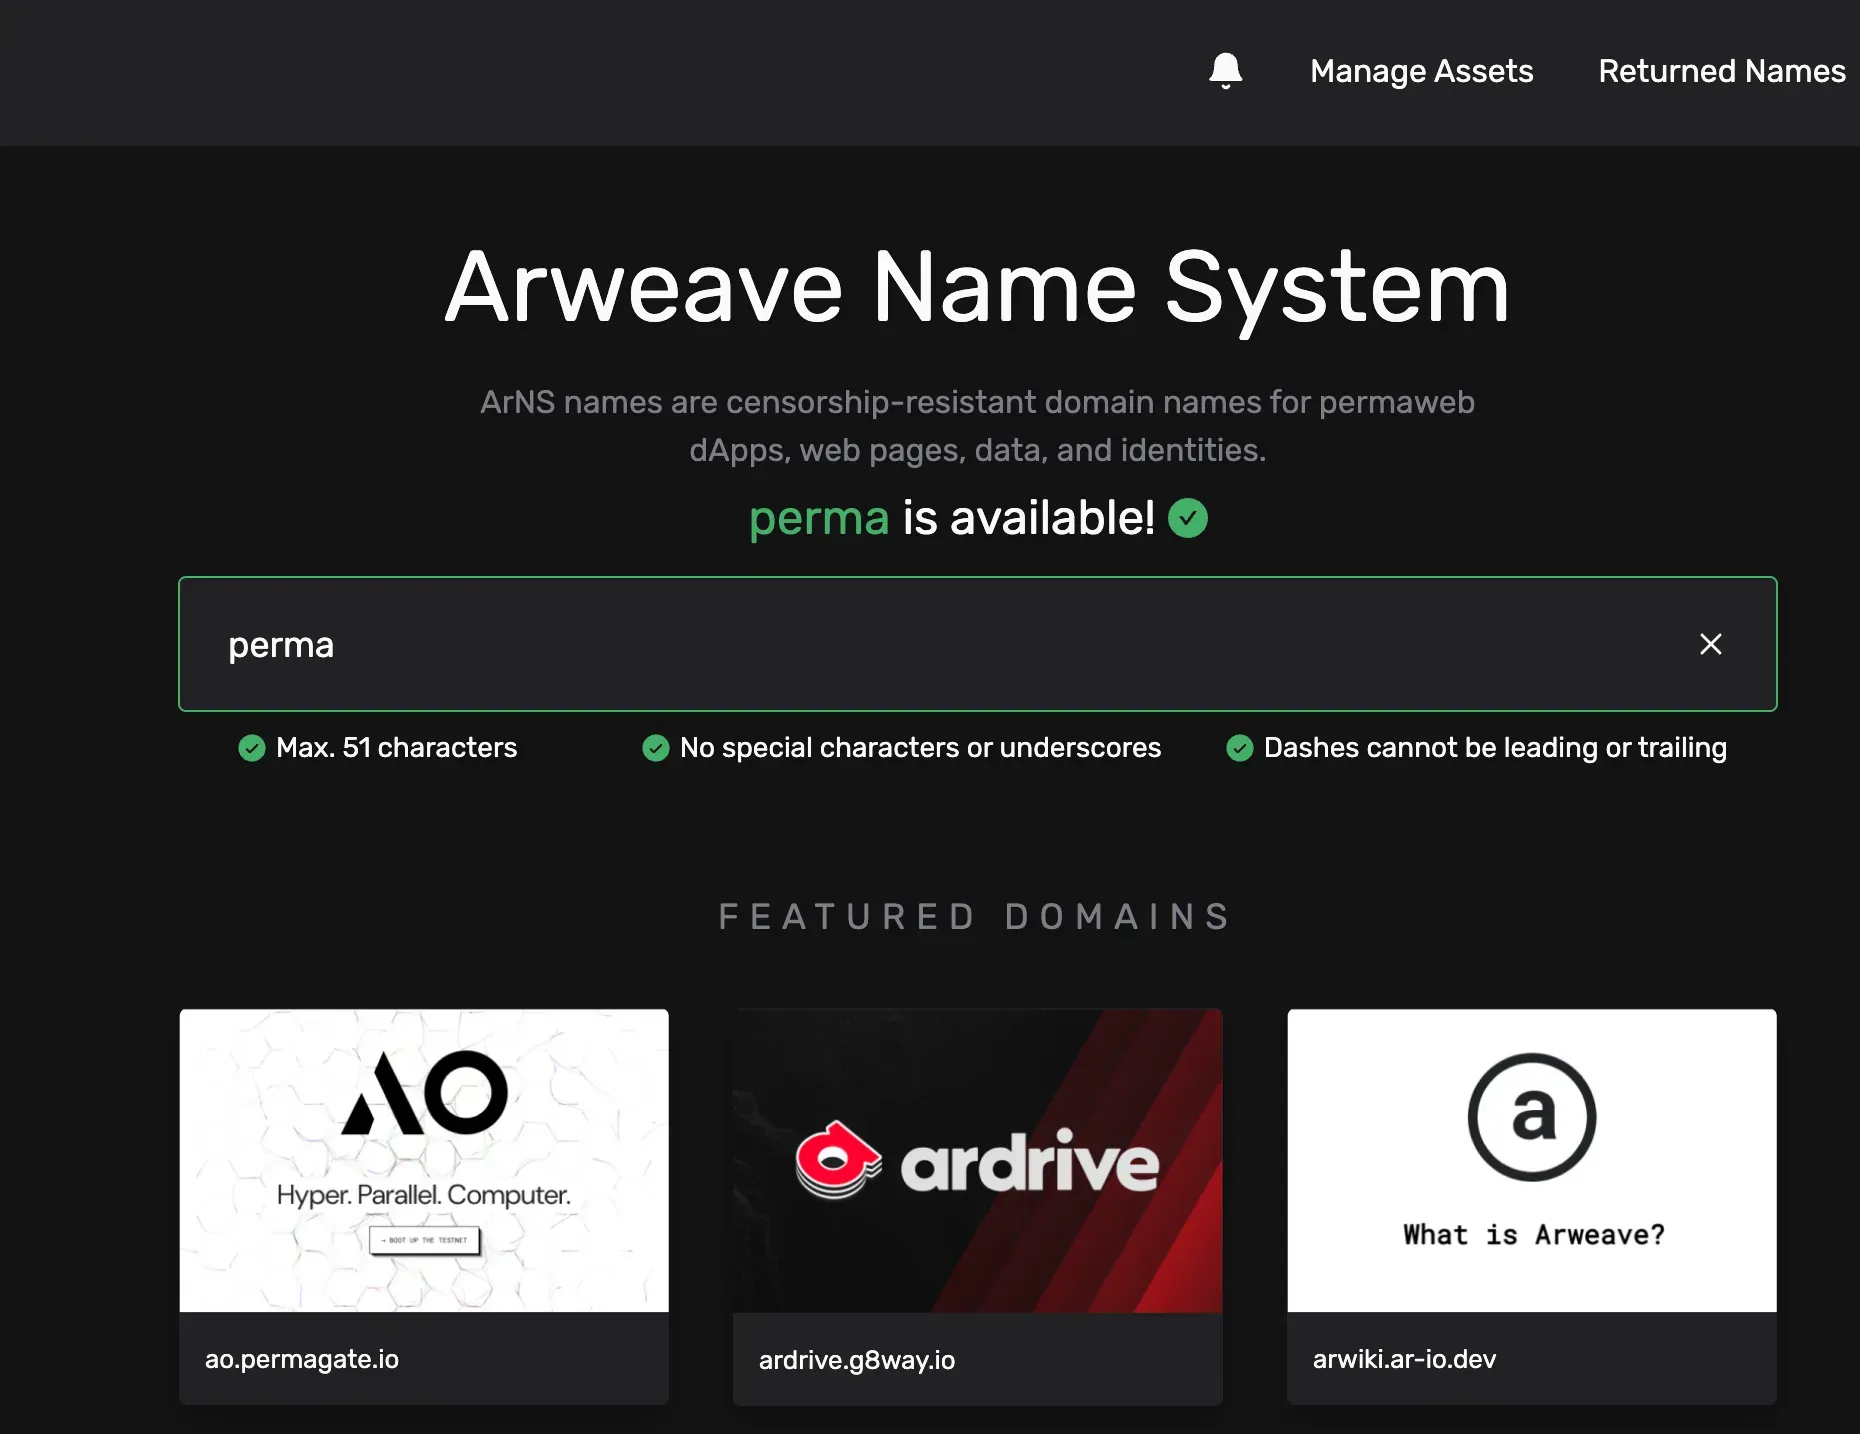
Such URLs are not very user-friendly. So, can we replace the hash with a more memorable and readable domain name? Absolutely! ArNS provides human-friendly domain names for any hash, address, or permanent website on the Arweave blockchain.
First, visit ArNS (https://arns.app/#/?search=) and register your desired domain name. You'll need to purchase some $tARIO on Permaswap (https://www.permaswap.network/#/) to select a domain duration—either “one year” or “permanent.” The cost in $tARIO depends on the length of the domain and the selected duration.
Once your domain is registered, link it to your transaction hash, and your webpage will be accessible via ArNS. For example, my ArNS is marshalorange, so after binding, my page can be accessed at:
Additionally, you can access it through any gateway on AR.IO.
By following these four simple steps, even without any coding experience, you can easily create a permanent webpage and deploy it on the Arweave blockchain. From designing your page to uploading the code and binding a user-friendly domain, your webpage becomes a permanent digital space uniquely yours.
Now, it’s time to take action! Start building your first permanent webpage and take your first step into Web3.
🏆 Spot typos, grammatical errors, or inaccuracies in this article? Report and Earn !
Disclaimer: This article does not represent the views of PermaDAO. PermaDAO does not provide investment advice or endorse any projects. Readers should comply with their country's laws when engaging in Web3 activities.
🔗 More about PermaDAO :Website | Twitter | Telegram | Discord | Medium | Youtube
